

Holiday House Design
Lighthouse


This project began with a design process and a partner (Mine was Tobias Van Dyke) and took off as a 2D design in AutoCad. Measurement was key in order for the parts to glue together smoothly after being laser cut; this was the hardest part for me as I had a difficult time visualizing the project as 3D. With our project being a lighthouse, it took a little give and take with the time at hand in order to create the most appealing product within the given time limit.
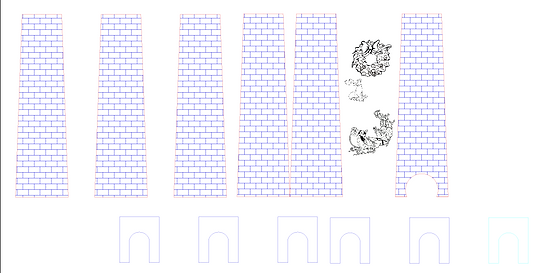
In AutoCad, my portion of the Lighthouse involved designing the side panels (we decided on a hexagon design) in which a light from inside could shine through. In order to accomodate the addition of a light, I created an "arc" hole where a cord could come through; the arc itself was a design choice and I used them again in the windows. I added brick texture to the side panels for a more realistic look. Tobias took care of the base, trim, deck, and roof.
The Laser Cut Holiday House was a two and a half week project involving the programs of AutoCad and Adobe Illustrator.
After working in AutoCad, I moved to Adobe Illustrator and Photoshop to work on graphics. I chose to create a wreath, a santa and sleigh for the roof, and a holiday seal to accomodate the lighthouse theme. To do this, I took the outline and drew a path around the graphics and then pasted both onto Illustrator. There, I adjusted the stroke thickness for cut and tweaked work paths as necessary.
The final digital step was moving the entire design onto illustrator and moving the pieces like a puzzle to be as resourceful as possible with the wooden board.
After that, the Laser Printer went to work. . .and the gluing/decorating began.
If I were going to change anything the next time I decided to laser print a house, I would have chosen a design that does not bend in like a lighthouse. . .or if I did, I would introduce the addition of tabs.